(Very Fast!) Procedural Biome Generation in Python

Hi !
In this post I'll explain how I coded a part of the procedural generation for the biomes in Pixplorer.
Pixplorer is a sandbox action-RPG. It blends elements from multiple games: it’s a Zelda-like in an infinite open world, a top-down Minecraft/Terraria, it shares similarities with Necesse and Stardew Valley, and it’s also inspired by Don’t Starve and Animal Crossing. In some of these games we need biomes and procedural generation. In this post, I’ll focus on how I quickly assign biomes to each block in Pixplorer.

In Pixplorer, biomes are the basis of the procedural generation. This means biomes determine terrain, elevation, and temperature, rather than the other way around (which is also possible but not used here). It is done this way to ensure the game can easily propose all possible biomes, without constraints that would be more realistic, but which could limit gameplay possibilities. I consider biomes as distinct zones, akin to levels in a game, except here it's an open world.
Pixplorer is coded in Python, which means that by default, due to the GIL lock, it is hard to gain performance from multithreading. When the player moves, I have to very quickly generate the new blocks around the player, based on the random seed of the game. To optimize Python performance, I use Numba which compiles Python code to machine code using JIT compilation. GPU acceleration could also be useful but it appears to have compatibility issues and I didn't follow this idea.
Infinite procedural generation of an open world has many constraints. One big constraint is that, from a random seed, you want to generate the exact same map every time everywhere. Of course it's not really possible in case you update the algorithm later. But for a same version of the algorithm, the map should be the same no matter how it is explored by players. This means all the possible tricks like "if X has been generated, don't generate Y" can't be used, because they would depend on how the map has been explored. For example you can't do "if a Pyramid was generated before, generate nothing here", otherwise the map wouldn't be the same depending on how it's explored by players, and this would also make debugging world generation more difficult. Because of this constraint, and also to optimize the algorithm, it's better to view world generation as a flow where you process matrices with mathematical operations, rather than a standard algorithm with many if/else conditions and complex loops. Simple numeric loops, especially those using NumPy arrays, can be significantly accelerated with Numba.
The world generation process in Pixplorer goes like this:
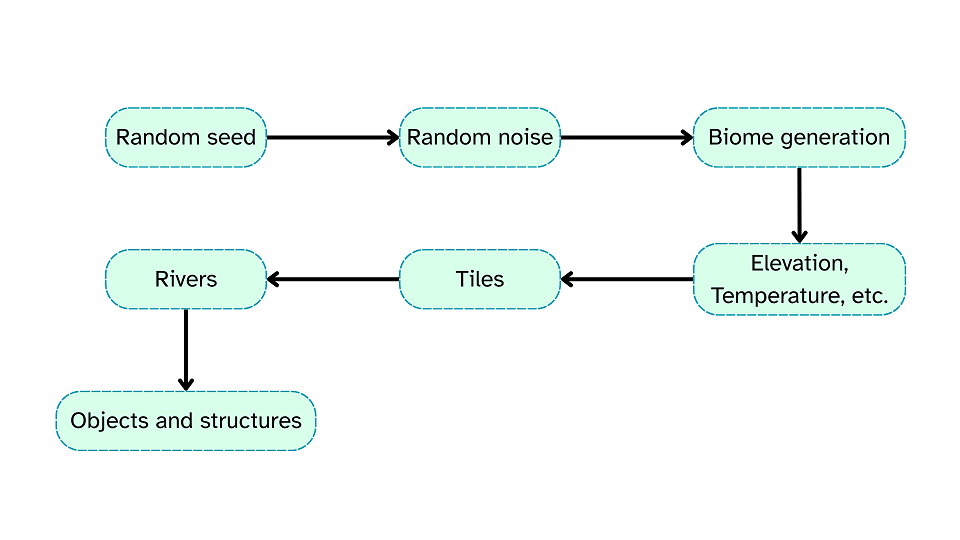
Here I'll explain how I did the 3 first steps: (random seed) => (random noise) => (biome generation).
The main idea was to implement a very fast algorithm that could produce "cells", a bit like a Voronoi diagram. Each cell / color would be one biome. Each pixel would be a tile / block.
The naive approach would be to generate random points on the map, and for each pixel, find the closest point. Obviously this approach, which I tried, is really inefficient and isn't appropriate as you would need to compute a lot of distances. Many optimized algorithms exist to solve this issue. But since the final result would still differ from our goal, I implemented a custom algorithm more specific to the generation of natural terrain / biomes I wanted for Pixplorer. It is based on vector and matrices computations. This way, my algorithm can easily be efficient in Python thanks to NumPy and Numba.
Let's begin!
We start with a random seed:
seed = random.randint(0,10000)
From this seed, we can generate 2D or 3D noise. I opted for the vnoise python library by abey79, after comparing its performance with other open-source codes I could find online (pvigier, davidsvy):
- "vnoise is a pure-Python, Numpy-based, vectorized port of the noise library. It currently implements the Perlin noise functions in 1D, 2D and 3D version (noise also implements simplex noise)."
NB : By default the vnoise library uses the "float" type from Python, I changed it to numpy's np.float32 to make it more efficient.
It's important to say that while the GIL prevents multithreading from speeding up pure Python code, it doesn’t for non-Python operations (e.g., NumPy or C extensions). This includes noise generation with the vnoise library. But I will not present this case here. Generating noise in chunks minimizes overhead from Python function calls and avoids slow pure-Python loops. We will work on a 300x300 map. Each pixel is a block / tile.
import vnoise, random
import numpy as np
import matplotlib.pyplot as plt

#generate the seed and prepare the noise generator
seed = random.randint(0, 10000)
noise = vnoise.Noise(seed)

#setup parameters and method
wh, zoom = (300,300), 10
l = lambda k: np.arange(0,k) / zoom

#generate and display noise
noise2D = noise.noise2(l(wh[1]), l(wh[0]))
plt.imshow(noise2D)
Result:
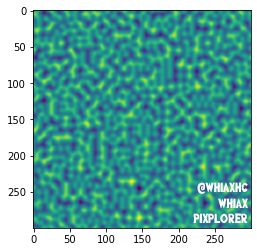
Great! Now we have our noise. So how do we turn this into nice-looking biomes?
This is the great part. We start from rectangular / square biomes based on a grid. Let's say we have a table which contains the position of pixels (x,y), the first line could be
- [(0,0), (1,0), (2,0), (3,0), etc.].
You can create "blocks" just based on these positions by dividing each line by the size of the biome. If your biome has a width of 2 pixels, you would get ( int(x/2), y), the 1st line would be
- [(0,0), (0,0), (1,0), (1,0) etc.].
Now you know how to create rectangular cells. Ideally each cell would have its own seed / "biome id" based on (x,y) values so we can randomly select a real biome: forest, lake, grassland etc based on this number. This can be done with pairing functions like Cantor pairing function.
#import libs
import vnoise, random
import numpy as np
import matplotlib.pyplot as plt
from numba import njit
rint = random.randint

#rectangular biomes
mapsize = 300
xs = np.arange(0,mapsize, dtype=np.int64)
ys = np.arange(0,mapsize, dtype=np.int64)
whbiome = (40,30)

#x/y associated in a cell
xsc = xs // whbiome[0]
ysc = ys // whbiome[1]

#(x,y) => id
@njit(cache=True)
def cantor(a,b):
    return (a + b + 1) * (a + b) / 2 + b

#get biome id = seed of the biome
@njit(cache=True)
def xyc_to_biomeid(xsc, ysc, mapsize):
    bid_map = np.zeros((mapsize,mapsize), dtype=np.int64)
    for dy in range(mapsize):
        for dx in range(mapsize):
            bid_map[dy, dx] = cantor(xsc[dx], ysc[dy])
    return bid_map
bid_map = xyc_to_biomeid(xsc, ysc, mapsize)

#associate a color to each biome id (not optimized)
map_img = np.zeros((mapsize, mapsize, 3), dtype=np.uint8)
bid_to_color = {}
for dy in range(mapsize):
    for dx in range(mapsize):
        bid = bid_map[dy,dx]
        if not bid in bid_to_color: bid_to_color[bid] = rint(0,255),rint(0,255),rint(0,255)
        color = bid_to_color[bid]
        map_img[dy,dx,:] = color
plt.imshow(map_img)
Result:
Very good! Now we have our cells and a biome ID (bid) for each. If you want a more random ID you can just create a new random seed from the original seed and the biome id, for example: biome_seed = bid * world_seed, you can use better algorithms (another pairing function for example). And if you have "n_biomes = len(all_biome_names)", you can do: biome_name = all_biome_names[biome_seed % n_biomes].
But we still have rectangular biomes!
Here’s where the magic comes in. We get back the noise layers we generated before, and we consider that this noise is a delta_x or delta_y (horizontal or vertical offset) to perturb the position used to get the id of the biome. Let’s proceed:
#create random dxy noise
zoom = 10
l = lambda k: np.arange(0,k) / zoom
seed = random.randint(0, 10000)
noise = vnoise.Noise(seed)
rdx = noise.noise2(l(s), l(s))
rdy = noise.noise2(l(s), l(s))

#randomly shift positions to fetch biomes
@njit(cache=True)
def get_mapyx(xs, ys, rdx, rdy, s):
    map_yx = np.full((2, s, s), 0.0, dtype=np.float32)
    a = 20
    for dy in range(s):
        for dx in range(s):
            x, y = xs[dx], ys[dy]
            x += rdx[dy,dx] * a
            y += rdy[dy,dx] * a
            map_yx[:,dy,dx] = (x, y)
    return map_yx

#build map with random shift of biomes
map_yx = get_mapyx(xs, ys, rdx, rdy, s)

#x/y associated in a cell
map_yx[0,:,:] //= whbiome[0]
map_yx[1,:,:] //= whbiome[0]

#(x,y) => id
@njit(cache=True)
def cantor(a,b):
    return (a + b + 1) * (a + b) / 2 + b

#get biome id = seed of the biome
@njit(cache=True)
def xyc_to_biomeid(map_yx, mapsize):
    bid_map = np.zeros((mapsize,mapsize), dtype=np.int64)
    for dy in range(mapsize):
        for dx in range(mapsize):
            bid_map[dy, dx] = cantor(map_yx[0, dy, dx], map_yx[1, dy, dx])
    return bid_map
bid_map = xyc_to_biomeid(map_yx, mapsize)
Result:
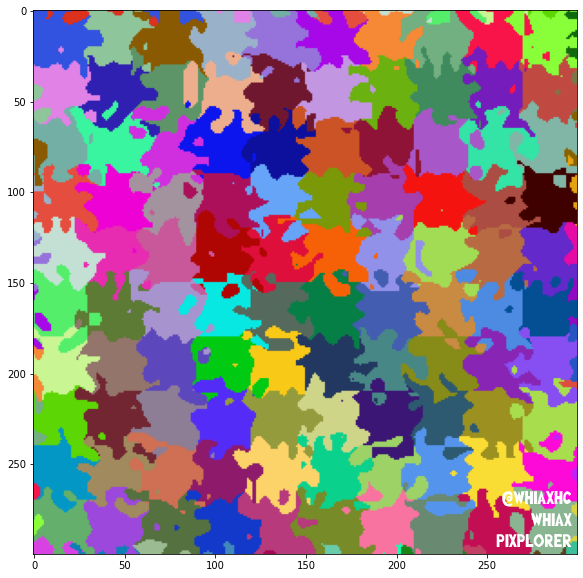
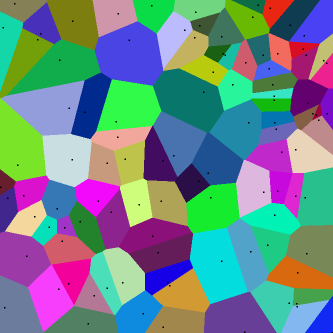
As you can see it's looking more like random biomes. If you play with the parameters, add a modulo for colors:
bid = bid_map[dy,dx] % 8
You can get much better results.
Final code
#LICENCE: CC-BY, if you use this code or parts of it, please credit "Whiax"
#import libs
import time
import vnoise, random
import numpy as np
import matplotlib.pyplot as plt
from numba import njit
rint = random.randint

#randomly shift positions to fetch biomes
@njit(cache=True)
def get_mapyx(xs, ys, rdx, rdy, s):
    map_yx = np.full((2, s, s), 0.0, dtype=np.float32)
    a = 30
    for dy in range(s):
        for dx in range(s):
            x, y = xs[dx], ys[dy]
            x += rdx[dy,dx] * a
            y += rdy[dy,dx] * a
            map_yx[:,dy,dx] = (x, y)
    return map_yx

#(x,y) => id
@njit(cache=True)
def cantor(a,b):
    return (a + b + 1) * (a + b) / 2 + b

#get biome id = seed of the biome
@njit(cache=True)
def xyc_to_biomeid(map_yx, mapsize):
    bid_map = np.zeros((mapsize,mapsize), dtype=np.int64)
    for dy in range(mapsize):
        for dx in range(mapsize):
            bid_map[dy, dx] = cantor(map_yx[0, dy, dx], map_yx[1, dy, dx])
    return bid_map

#rectangular biomes
mapsize = s = 300
xs = np.arange(0,mapsize, dtype=np.int64)
ys = np.arange(0,mapsize, dtype=np.int64)
whbiome = (30,20)
#create random dxy noise
zoom = 7
l = lambda k: np.arange(0,k) / zoom
seed = random.randint(0, 10000)
noise = vnoise.Noise(seed)
rdx = noise.noise2(l(s), l(s))
rdy = noise.noise2(l(s), l(s))

#build map with random shift of biomes
map_yx = get_mapyx(xs, ys, rdx, rdy, s)

#x/y associated in a cell
map_yx[0,:,:] //= whbiome[0]
map_yx[1,:,:] //= whbiome[0]

bid_map = xyc_to_biomeid(map_yx, mapsize)

#associate a color to each biome id (non optimized)
map_img = np.zeros((mapsize, mapsize, 3), dtype=np.uint8)
bid_to_color = {}
for dy in range(mapsize):
    for dx in range(mapsize):
        bid = bid_map[dy,dx] % 8
        if not bid in bid_to_color: bid_to_color[bid] = rint(0,255),rint(0,255),rint(0,255)
        color = bid_to_color[bid]
        map_img[dy,dx,:] = color
plt.figure(figsize=(10,10))
plt.imshow(map_img)
My laptop generates these 300x300 tiles in 0.017 seconds. This means you can generate a map of any size almost instantly for an infinite open world.
_____________________
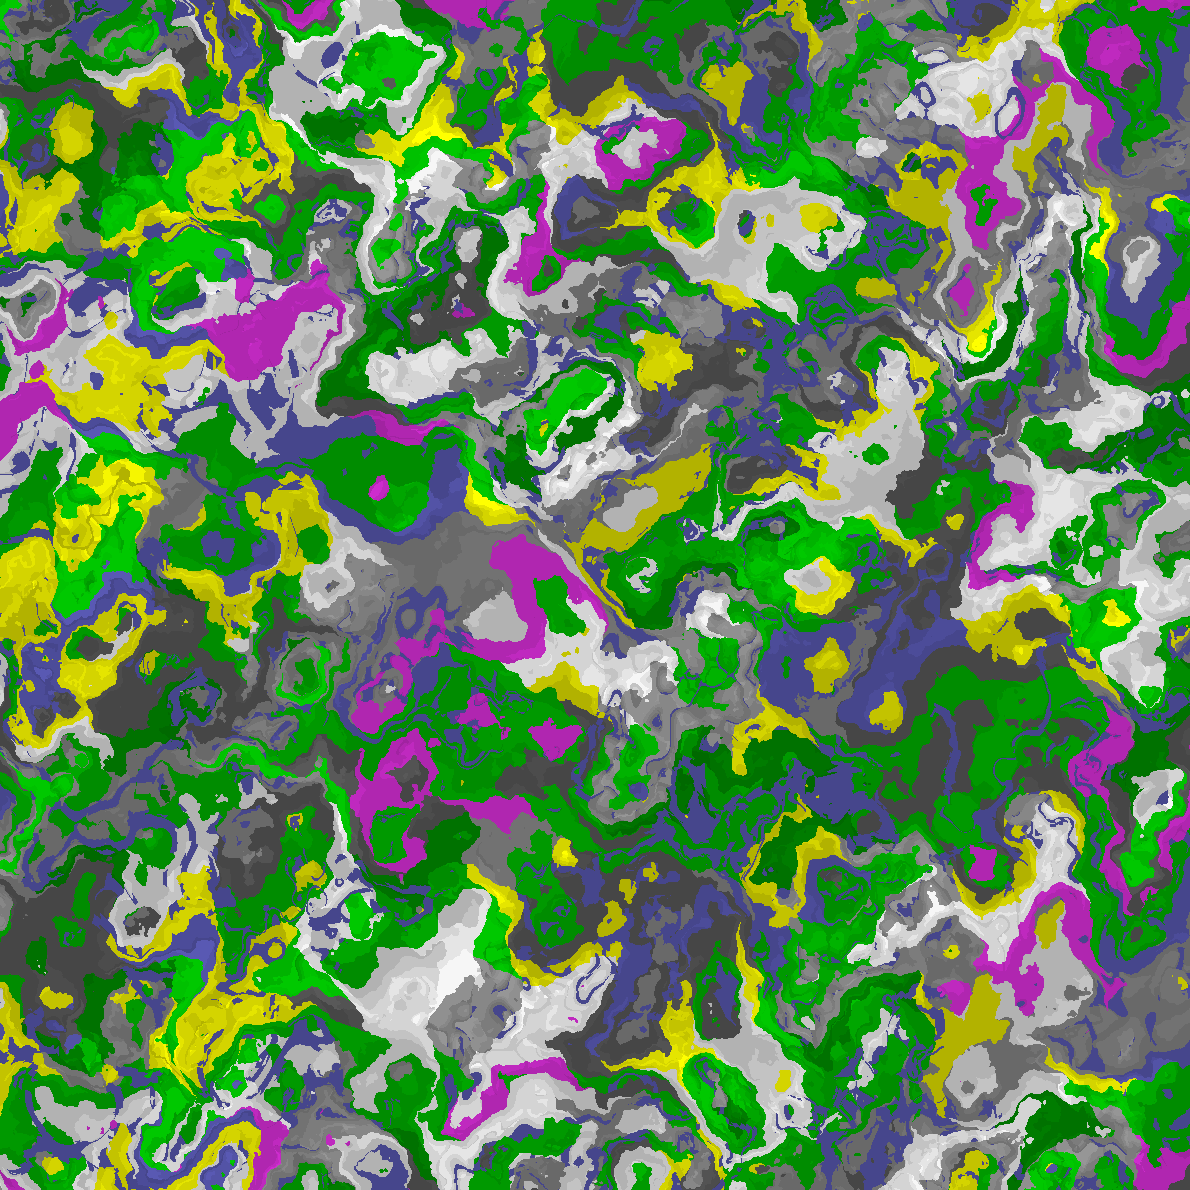
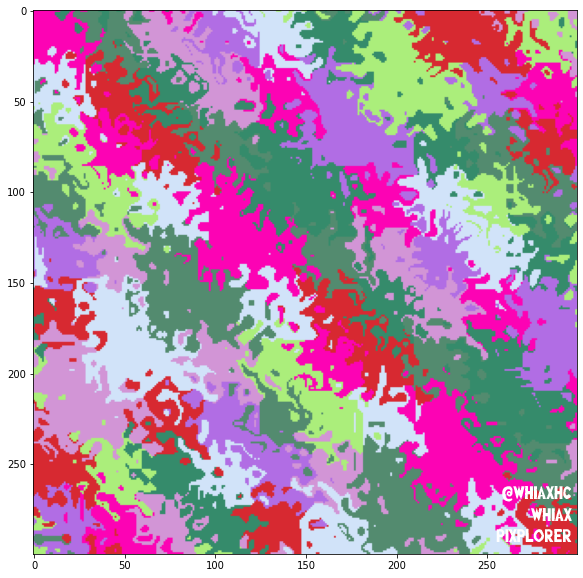
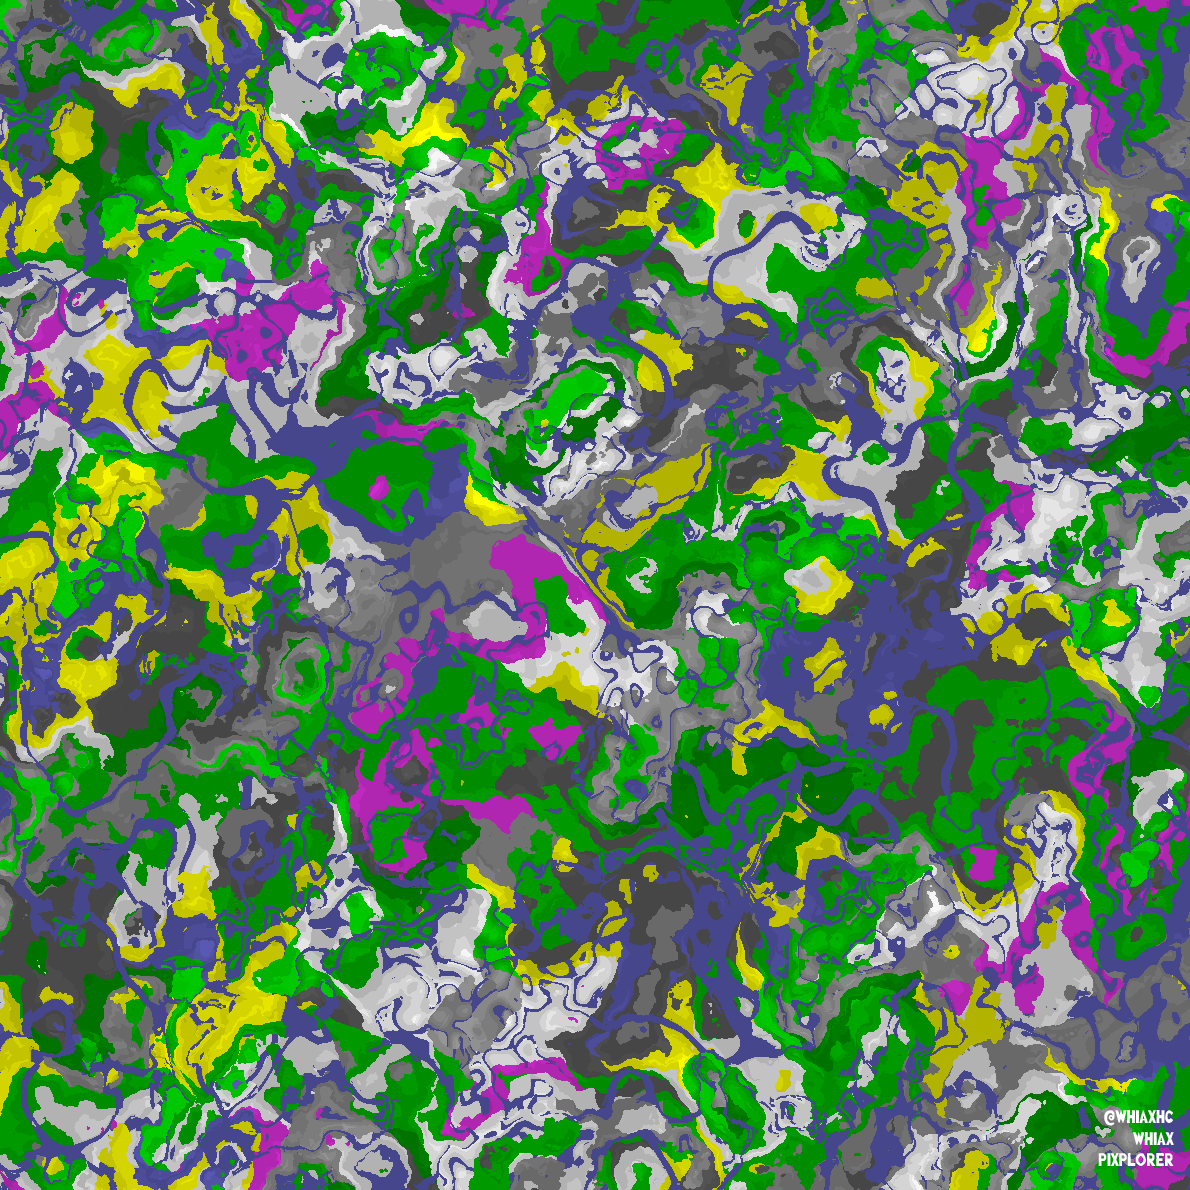
I further refined the algorithm to achieve the following results. I added interpolation between multiple noise layers to smooth out abrupt transitions (threshold effects) at biome borders. Without interpolation, you might notice horizontal or vertical artifacts in the generated map. Some parameters can also cause biomes to appear in diagonal, it's something I haven't tried to solve yet. It can't be noticed with the right parameters and if you zoom enough. With the right color palette and additional noise layers for terrain relief and rivers, the result can look great !
Main results (1190 x 1190):
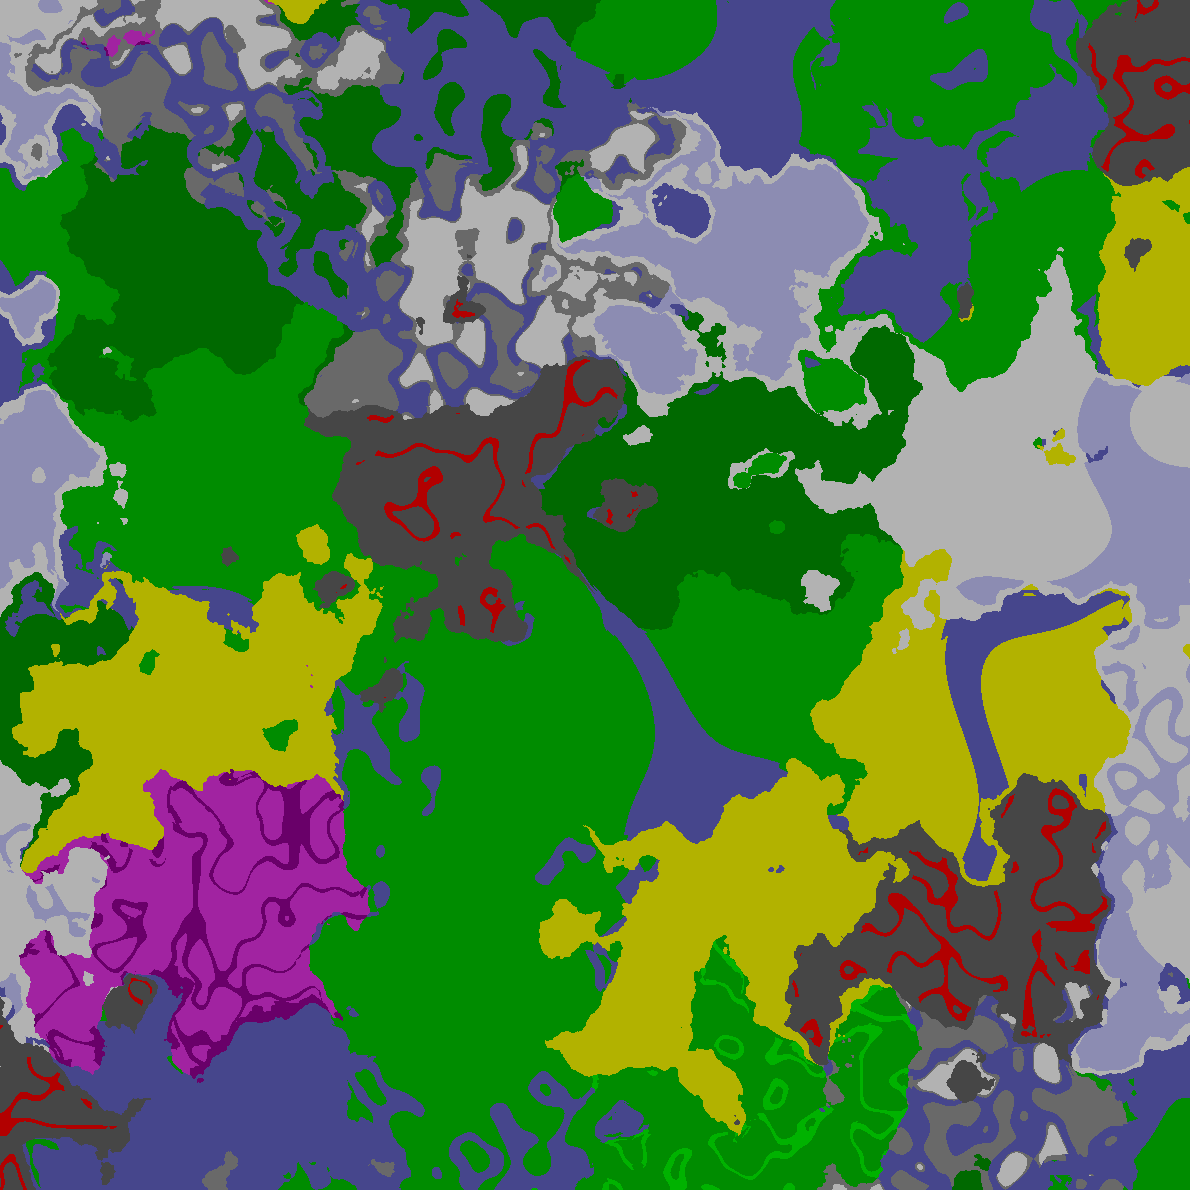
Other parameters and without relief (1190 x 1190), you can notice all the small islands:

That's it! Now you know how I generate biomes in Pixplorer. This article was a simplified presentation for curious readers, players and developers. Ideally you'll want to improve the algorithm a lot for your own need and find the right parameters! I always loved procedural generation and world generation and read many articles about it. I can easily recommend the blog Red Blob Games or the article explaining how Vagabond does it. I really like when developers openly explain their methods. Of course there are also many videos on Youtube explaining how Minecraft does world generation. It's also very interesting in our case, because contrary to a lot of other games I cited, Pixplorer has a real 3D terrain. It really makes procedural generation a lot harder if it's not well optimized. And I have to admit that it's currently not optimized enough in Pixplorer, which is why you can't dig very deep (-5), build very high, or have big caves in the game ... yet. Hopefully it's only a matter of time!
The code shared in this post is available under a CC-BY license, so feel free to use it in your own projects, just remember to credit me if you do please.
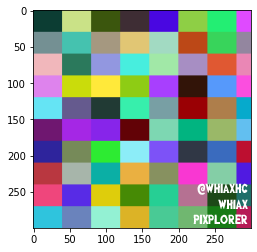
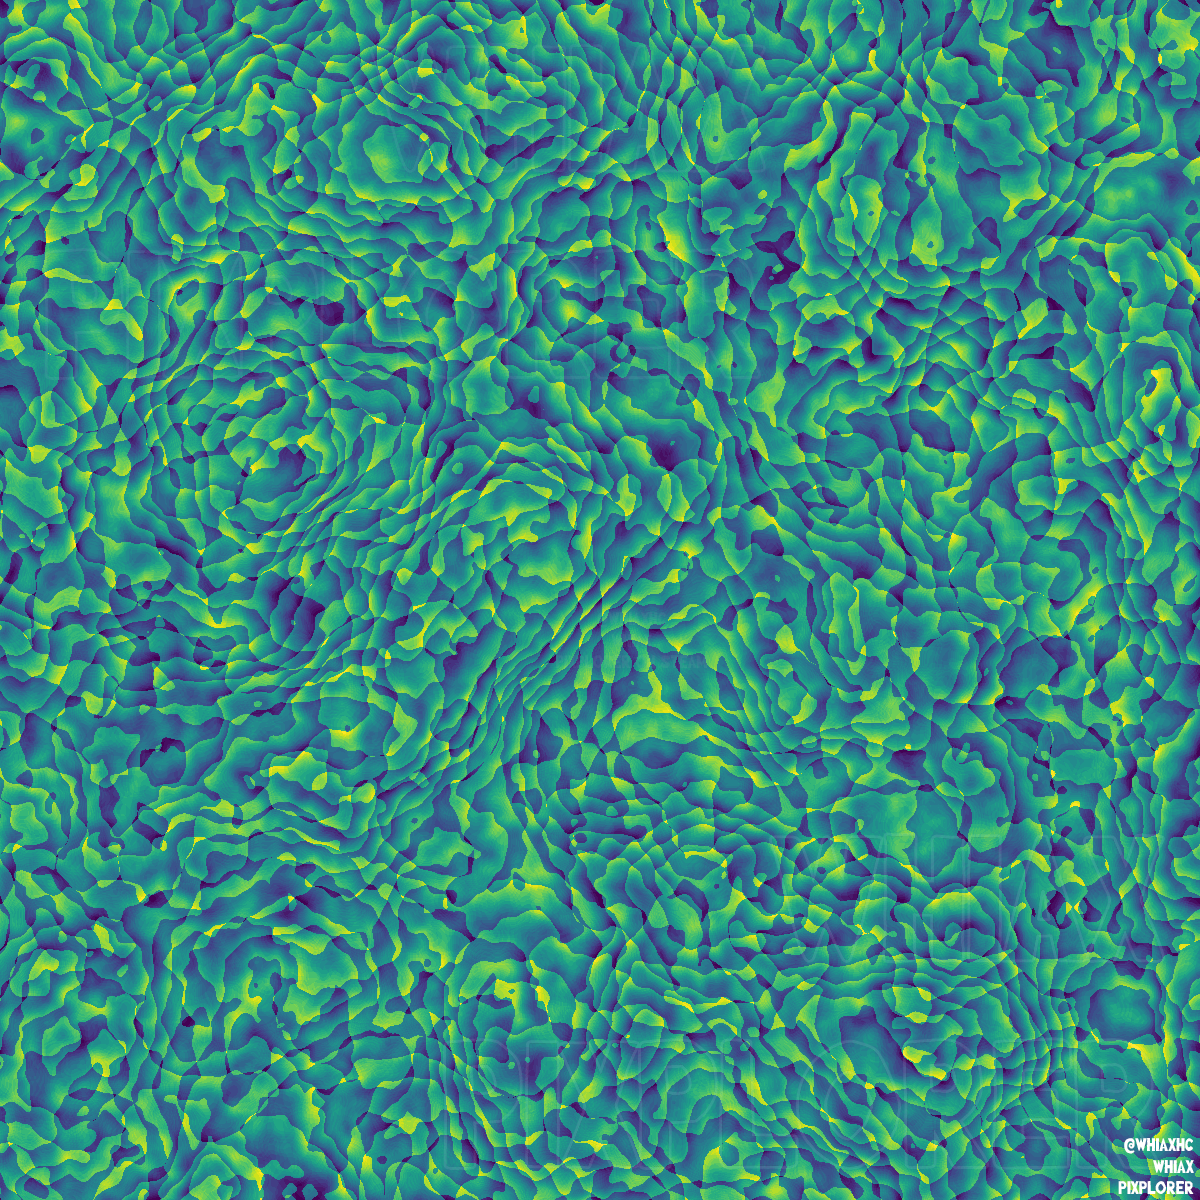
BONUS
While experimenting with 2D noise algorithms, I generated this nice pattern! I thought it was beautiful.
Enjoy :) !
If you’d like to support this post or Pixplorer, you can consider wishlisting it on Steam or trying it when it releases!
It helps me stay motivated, thank you very much ! :D
- Whiax
Links
Leave a comment
Log in with itch.io to leave a comment.